Create a Modifier Group
To begin creating modifiers use the  this will then open up to the page below.
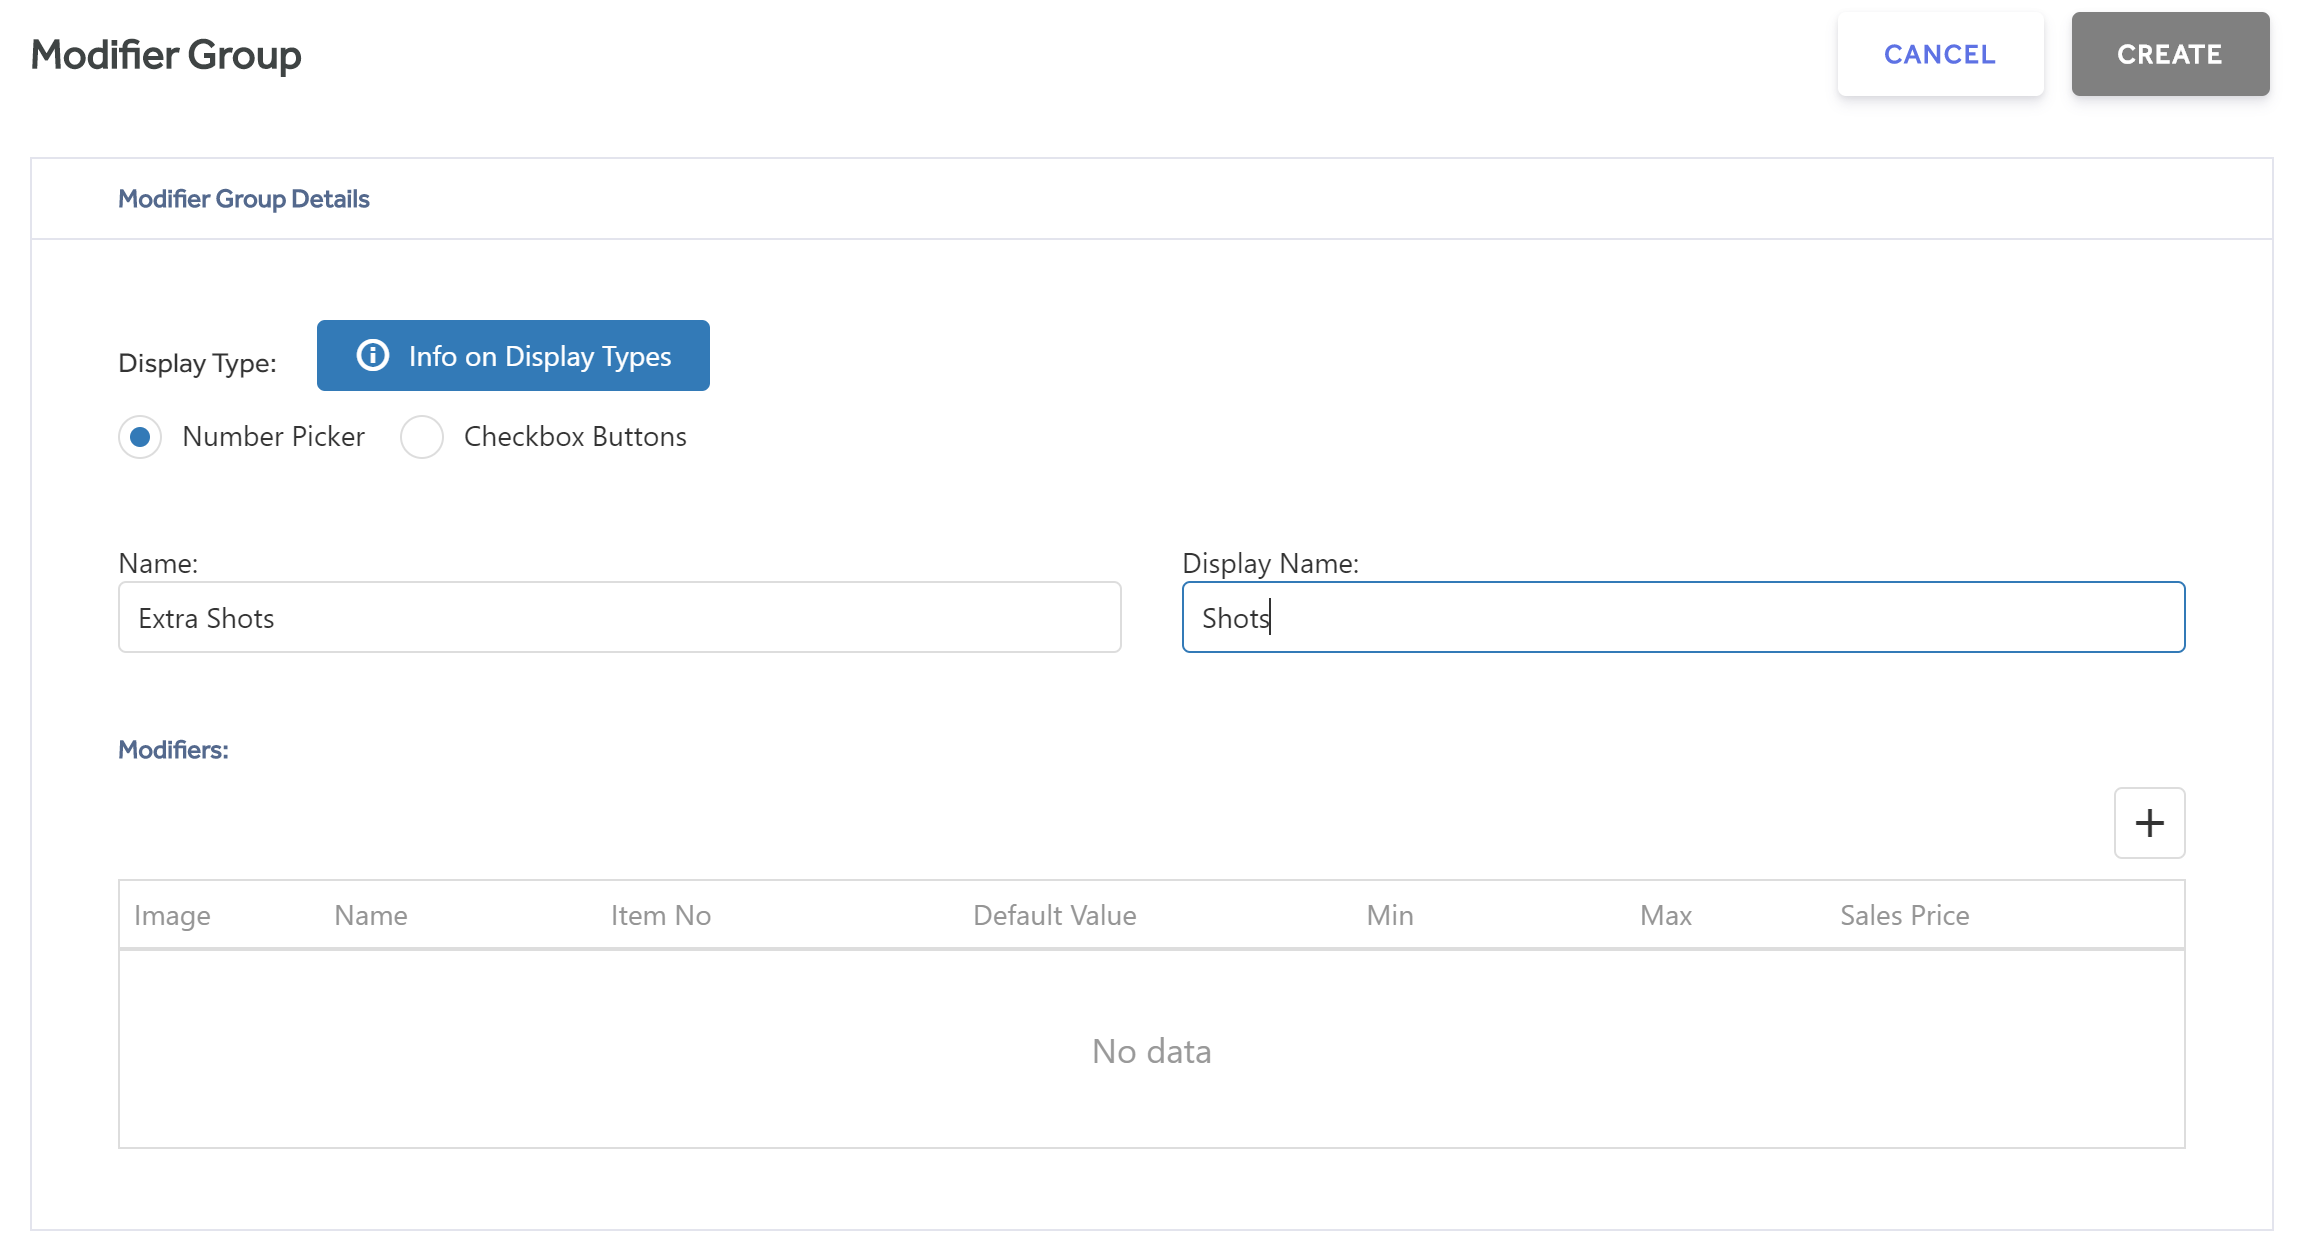
Number Picker - This uses a +/- button to increase and decrease selection amounts. For example this can be used for an "Extra Shot". You can group as many of these together as required to avoid the need of seperate sections for each number picker.
Checkbox Buttons - This uses tick boxes for selections. For example a sandwich which could have different fillings like lettuce, tomatoes or onion.
Name - This should be the name used internally.
Display Name - This should be the name seen by front end users.
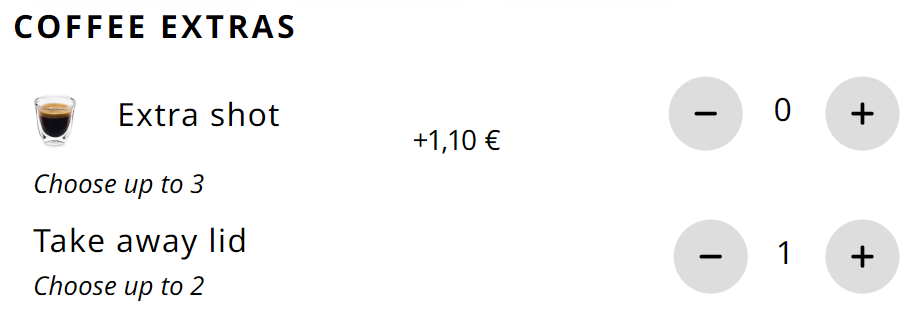
Number Picker example.
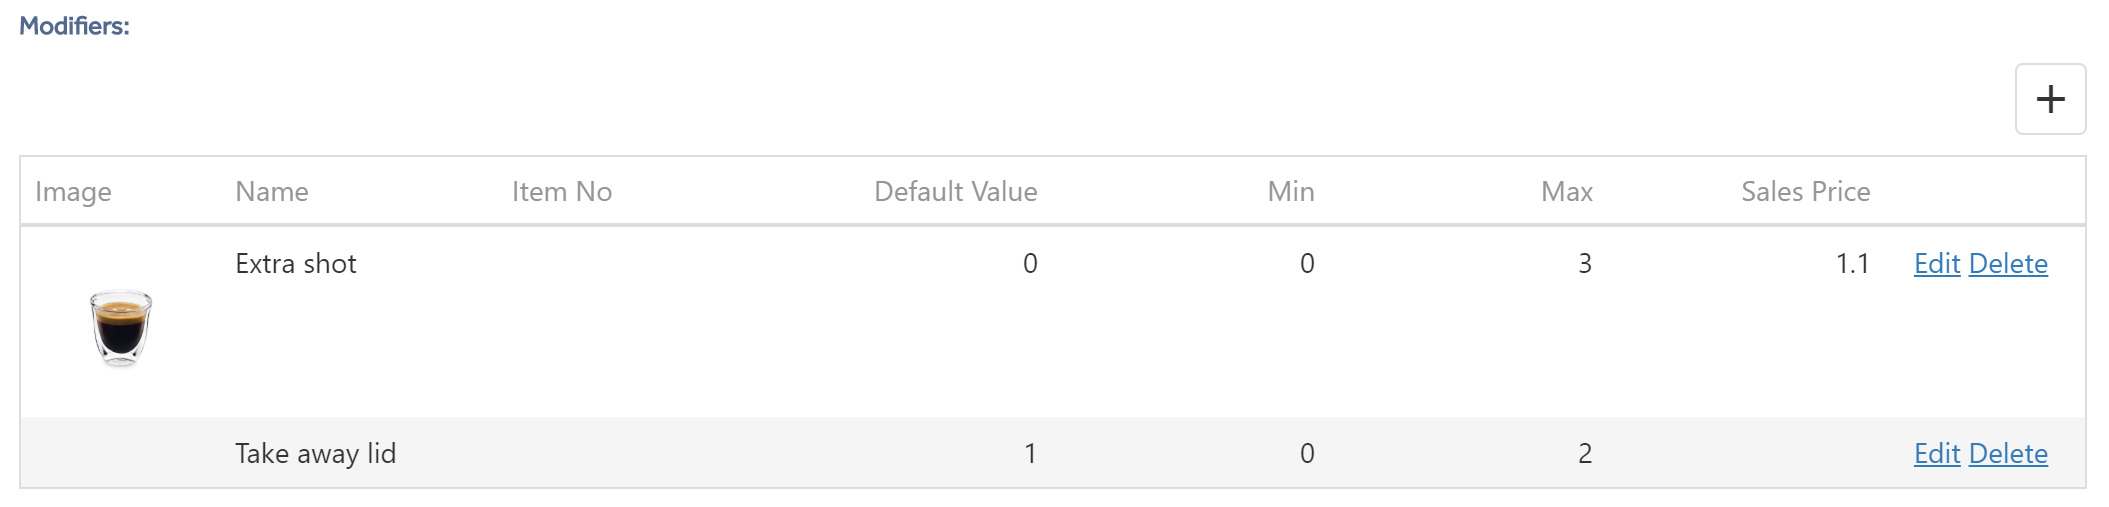
You can add/edit as many different number pickers into your Modifier Group as required within the table. To add more modifiers use the ![]() to add a new line.
to add a new line.
Image - Enter a URL for an image to be shown against the modifier in the front end apps. Only .bmp, .gif, .jpg and .svg type images are supported.
Name - The name of the modifier as it appears in the front end apps.
ItemNo - Used for integration purposes, you can link a modifier to an existing Imagine item which can then be related to a third party ERP system item.
Default Value - The number you get by default upon selection. For example if you wanted to name it simply "Shots" then you could set the default value to be 1.
Min - The minimum value you can enter for the modifier. Using the example above if you wanted to name this simply "Shots" then you would have the default as 1, and the minimum as 1,
Max - The maximum number allowed to be entered for the modifier.
Sales Price - Optional sales price's for modifiers that get added to the price from the default value.
Example: If you have a default number of 1 for shots and each shot costs £1.10 this will be added on top of the item price each time a shot is increased. However if the default is 1 but you have set the minimum to be 0, then the price will NOT be subtracted for removing the default shot you are offering. So the customer cannot make the base price cheaper by removing modifiers.
Ensure you save the individual rows before trying to add a new row or save the group. it will only save changes which have been individually saved in that table.
Example
Coffee Price: £3.00
Shot Price: £1.00
Default Shots: 2
Minimum Shots: 1
|
Number Of Shots |
Coffee Total Price |
Reason |
|
1 |
£3.00 |
Base price is £3.00 and they have removed 1 shot, but you do not have the cost of the shot removed for your default shots |
|
2 |
£3.00 |
Default number of shots, therefore default coffee price applies |
|
3 |
£4.00 |
2 default shots included in the price, 1 additional shot for £1 |
|
4 |
$5.00 |
2 default shots included in the price, s additional shots for £2 |
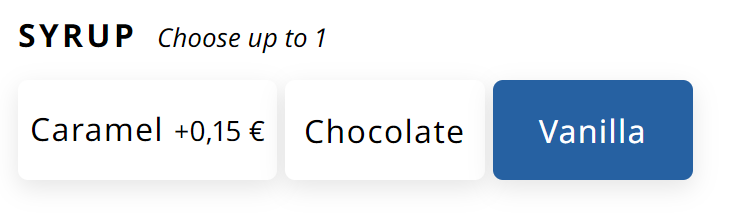
Checkbox Button example.
These are named as Checkbox Buttons, as much like in any form you can select one, many or none of them, and because they appear as selectable buttons in a touch friendly manner. You would use these when you wanted to make one or more optional or mandatory selections.

Name - This should be the name used internally.
Display Name - This should be the name seen by front end users.
Min - The minimum value you can enter for the modifier.
Max - The maximum number allowed to be entered for the modifier.
If you have a modifier that is not mandatory for selection then the minimum should always be 0. A coffee for example, this would be your Syrups.
However, if you want to ensure that 1 modifier is always selected you would set the minimum to 1.
In both examples you would generally set the Max to be 1 as this will ensure the user only selects a maximum of 1 within that group. So if you were to have optional Pizza Toppings then you may choose to set a much higher limit.
Much like Number Pickers, the actual modifiers themselves get created/modified within the table below from here you can add, delete or amend rows.
NOTE: Remember to Save the individual rows before trying to add a new row or save the group. it will only save changes which have been individually saved within the table.
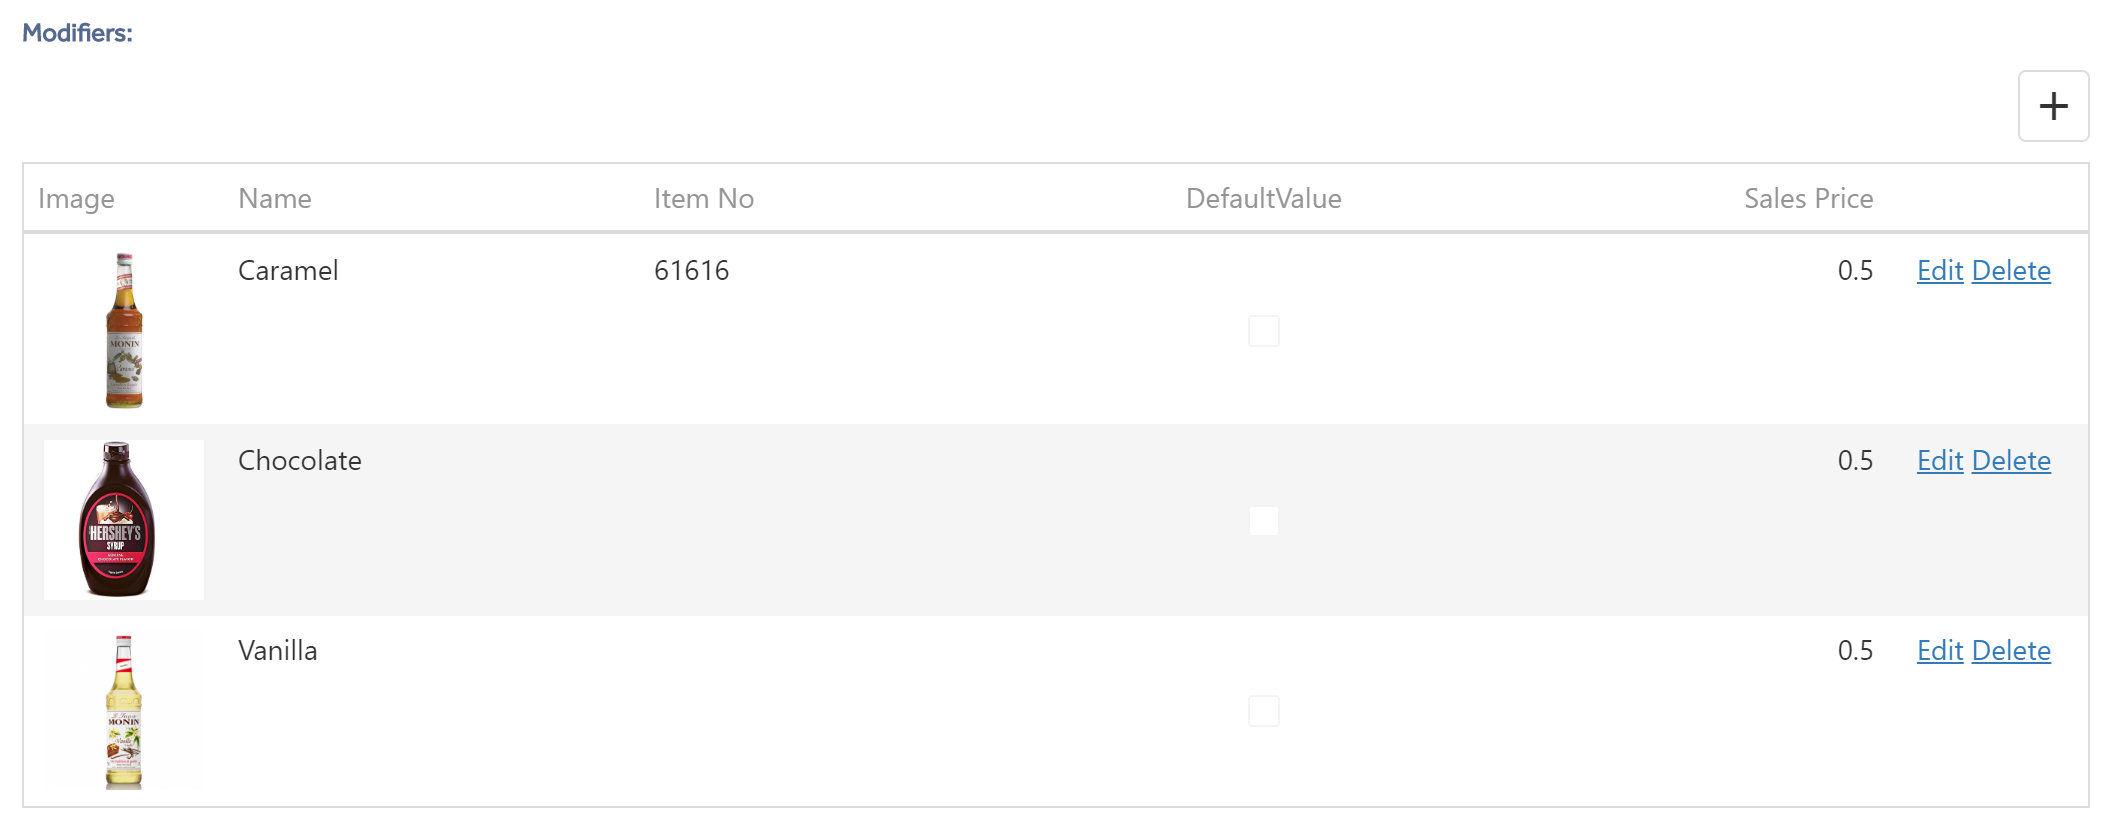
Image - Enter an image URL this will be shown against the modifier at the front end.
NOTE: Only .bmp / .gif / .jpg /.svg images types are supported.
Name - The name of the modifier as it appears in the front end apps.
ItemNo - Used for integration purposes, you can link a modifier to an existing Imagine item which can then be related to a third party ERP system item.
Default Value - If the button is selected by default. For example in the case of a Latte, you might have Semi Skimmed selected by default..
Sales Price - Optional sales price's for modifiers that get added to the price of the default value.
Example: Selecting a syrup will add £0.50 onto the price of the coffee you are purchasing. Similar to the Number Pickers, if you have a default selection that is chargeable it will not subtract that value from the price of the item. You can also have a higher prices for more premium modifiers to increase revenue.