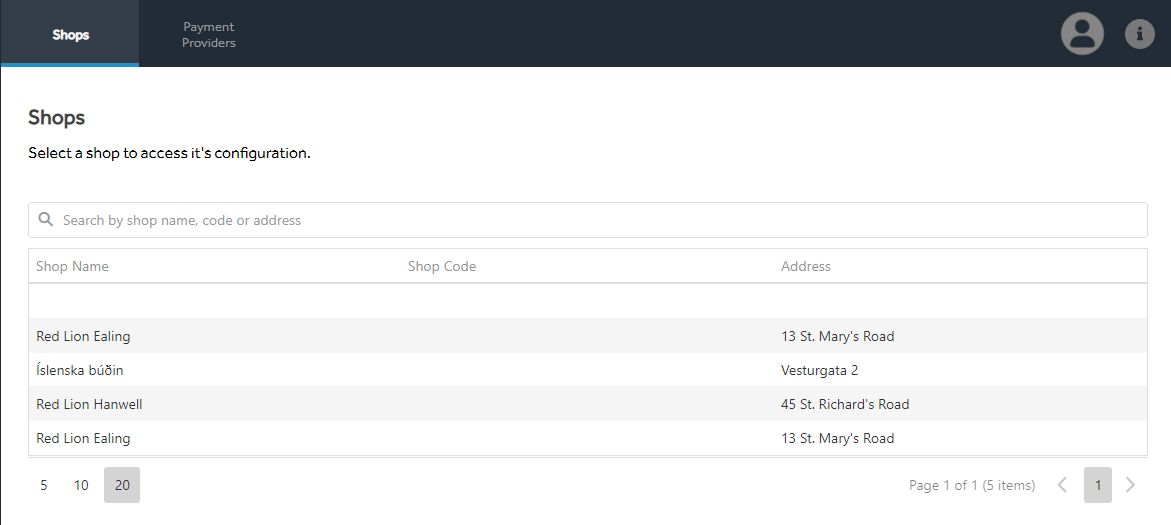
Shops
The Shops screen lists your current shops (active and inactive) and allows you to select a shop in order to perform configuration for that shop. Click a shop row to see the configuration tabs.
TOP Tables
This is where you configure your tables for use by TOP. Press the + button to add a new row.
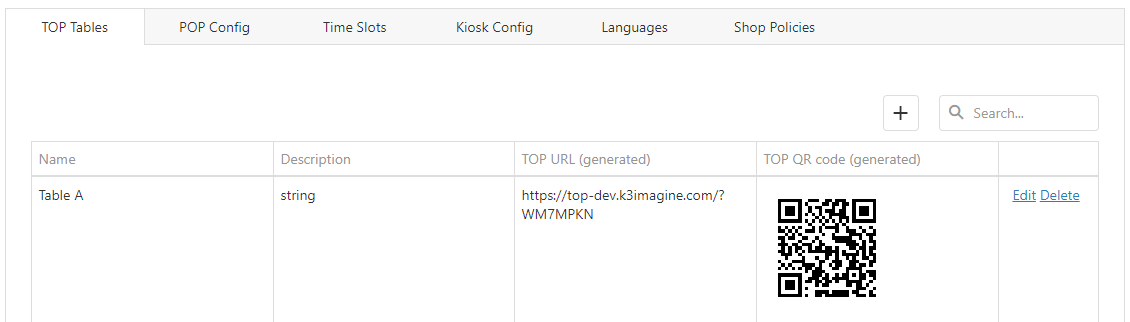
- Name is the name of the table which appears in TOP and also the OSD. It is how a table in Imagine is linked to a physical table.
- Description is a loose description of how you might reference a table. it could be based upon general location or number of seats
- TOP URL is generated automatically when you save the record. This gives you the URL that can be used to access TOP to be embedded elsewhere if you choose to link to it from an external source. Clicking the URL will copy it to your clipboard for pasting elsewhere - for example encoding to an NFC dot.
- TOP QR Code is generated alongside the URL. You can then copy the generate image and print it in whatever collateral you want to attach to your table, like a fixed menu or laminated sticker.
You can edit and delete tables if you have made errors.
POP Config
This is where you make any configurations for POP.
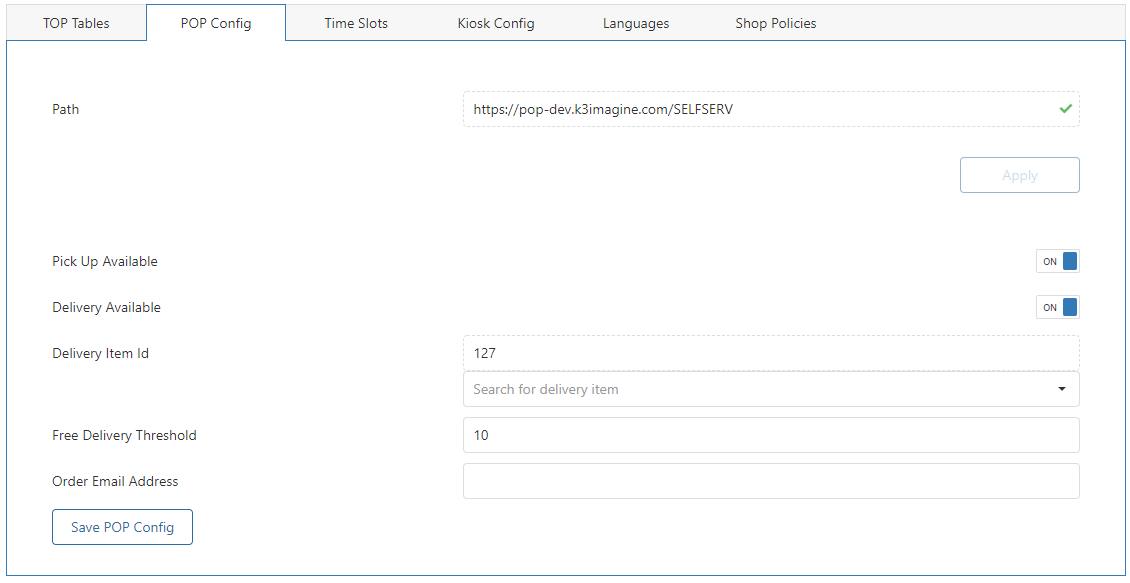
- Path is the URL that you can use to access POP for the selected shop. it validates the URL and must be unique, not only for your shop but for all tenants using Imagine.
- Pickup Available will enable the ability for you to have a Collection order in POP
- Delivery Available will enable the ability for you to have a Delivery order in POP
- Delivery Item is required so it can attach a delivery charge to the transaction. You will not be able to charge a delivery fee without it being present, so create one in Inventory and then select it here.
- Free Delivery Threshold is the transaction value it must reach to be able to offer Free Delivery. orders less than this value will be subject to the delivery charge
- Order Email Address is the location orders are set to notify you that something needs to be processed, usually in the OSD but you could manage your own external process on this.
Time Slots
Time Slots are used to allow customers using POP to determine a future time that they want to collect or deliver their order.
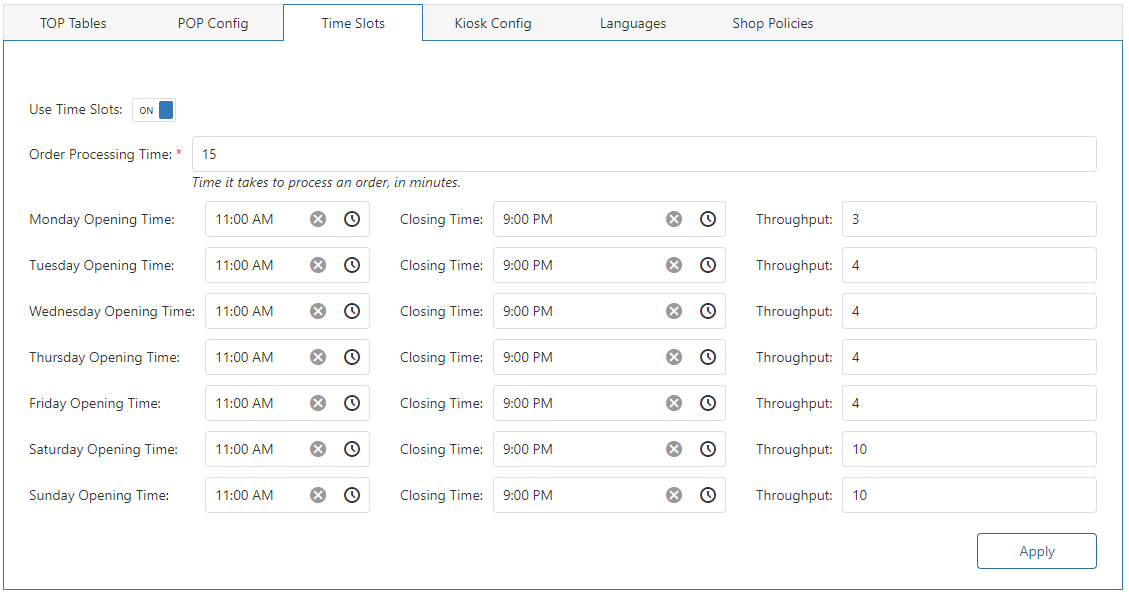
- Use Time Slots needs to be On in order for POP to display time slots dependent on the configuration provided here
- Order Processing Time is used as a rough estimate as to how long it takes to prepare an order and it also determines the time slots which get generated. For example, 15 mins here means it will generate a timeslot for every 15 minute period.
- Opening Times are required to ensure that customers only shop during the allocated times
- Throughput is the number of orders you can process per timeslot. So in the example above, on Mondays you have enough staff to process 5 orders every 15 minutes.
Kiosk Config
This is where you add specific configurations for the Kiosk.

- Hide Average Waiting Time will, if configured, suppress the average waiting time that appears at the end of a Kiosk transaction.
Languages
This is where you configure the languages which appear for your SelfServe Apps, specifically for customer driven apps such as Kiosk and SCO. Imagine supports many languages, those currently translated appear in the drop down list. For a certain location you may only wish to show certain languages to your users, you will select those preferred languages here.
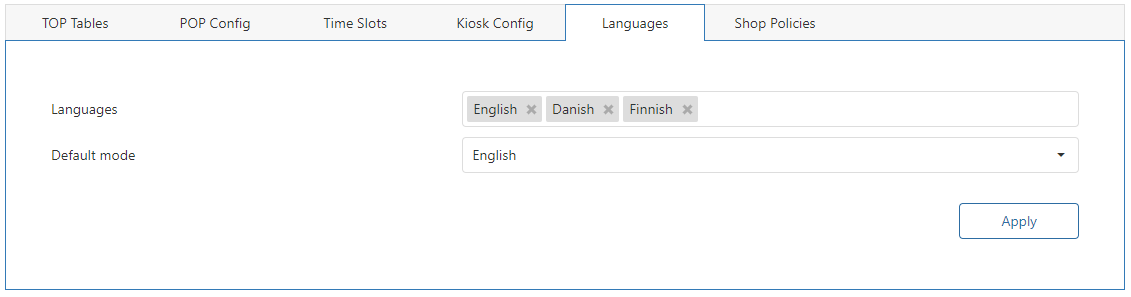
- Languages lets you pick which languages get displayed to the user
- Default mode allows you to pick which from your selected languages which one will be the default. The default language is the one presented to the customer in the first instance
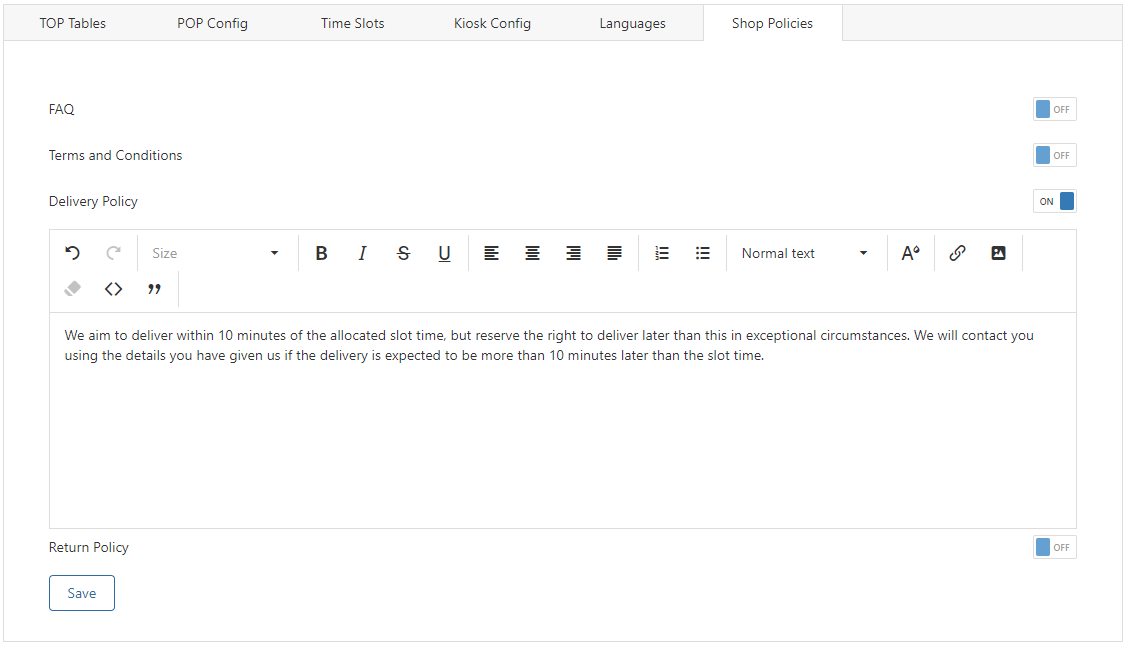
Shop Policies
This is where you configure your FAQ, Terms and Conditions, Delivery Policy and Return Policy that appears in POP. Toggle the relevant "On/Off" switch to enable or disable a particular policy. Use the text area to provide the content customers will see. Click Save when any changes are completed