Setup
Setup
This will involve setting up an account with Fiskaly and providing the api keys that the Imagine integration will use to access the Fiskaly system.
Step 1 – Fiskaly API Keys
Create an account on Fiskaly https://dashboard.fiskaly.com/, then developers -> api keys -> Create API Key, give the api key a name.
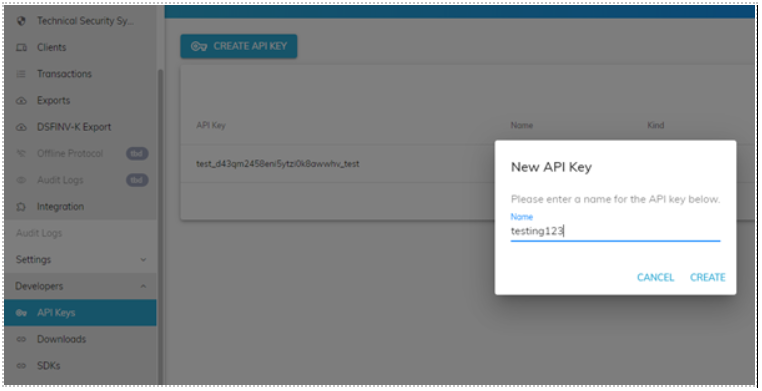
Then make a note of the given API Key and API Secret.
Step 2 – Shop Feature
In the Platform Admin Module, find the tenant you wish to enable fiskaly for, then against the tenant add a new shop feature with the exact name of “fiscalization” is required to be setup against the store that you wish to wish to enable Fiskaly for, you need the following values to be created.
|
Name |
Type |
Value |
|
Active |
boolean |
true |
|
microserviceurl |
string |
|
|
apidetails |
string |
{"apiKey":"xxxx","apiSecret":"xxxx","vatRates": "20,5,0","skipQRPrint":false,"ItemDescription":"Parameter2","ItemId": "Parameter3"} |
Put the apiKey and the apisecret in the apidetails value at the appropriate places. The vatRates setting represents the VAT percentages that the system will use to determine the VAT Codes in fiskaly, the first is always the Standard Rate, the second the Reduced Rate, the third the zero rate. The skipQRPrint in the apiDetails can be set to true if you want to skip the generation and printing of the QR on the receipt. The ItemDescription:Parameter2, and ItemId:Parameter3 are used to indicate where the description and item id are mapped from the item entity in imagine.
Step 3 – Connector Setup
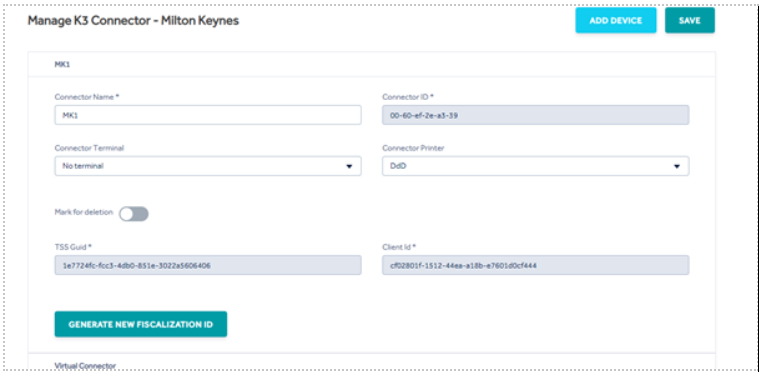
Go to the Admin Module, then Manage K3 Connector, against each connector now you should see TssGuid and Client Id and a button with an option to generate Fiscalization ID, press this to generate the Ids needed to Fiskaly for each of the connectors you wish this feature to be enabled for.
Step 4 - Purchaser Agency Setup
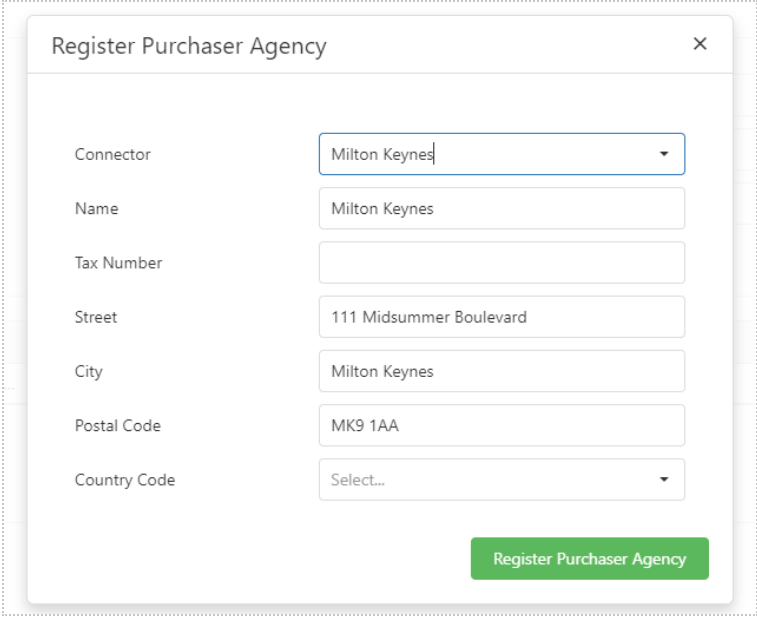
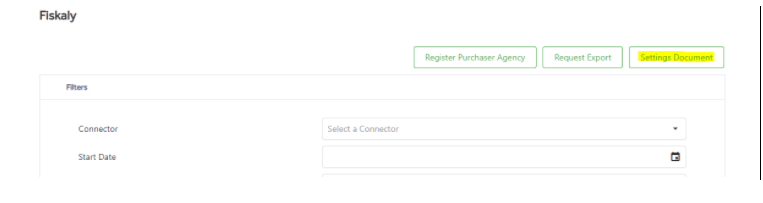
Go to the RBO Module, then at the top menu, click the drop down and select Fiskaly, to register and create a Purchaser Agency Press the "Register Purchaser Agency" button.
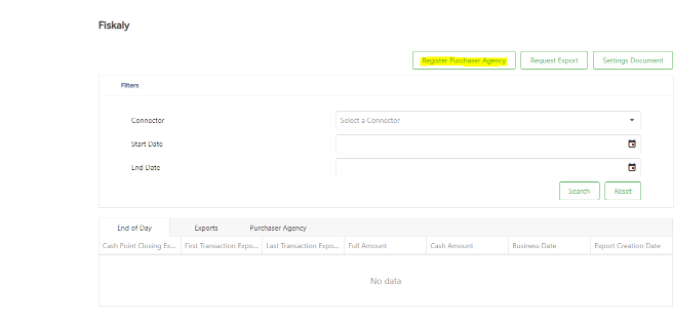
This will bring up a pop up, select the connector that you wish to create the Purchaser Agency for, it will populate details from the shop that the connector is assigned to in the address fields, you can overwrite these, populate the remaining fields, press "Register Purchaser Agency", to create the record in fiskaly.
When the end of day procedure is completed now, then it will put end of day transaction against that purchaser agency.
Step 5 - Settings Document
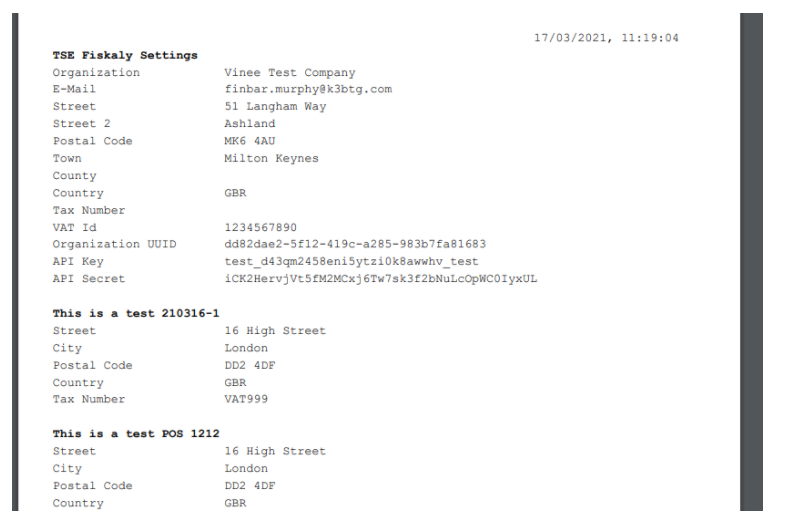
Once all connectors and purchaser agencies have been registered then on this fiskaly screen you can press "Settings Document", this will produce a pdf document containing all the Fiskaly settings which have been created and setup.
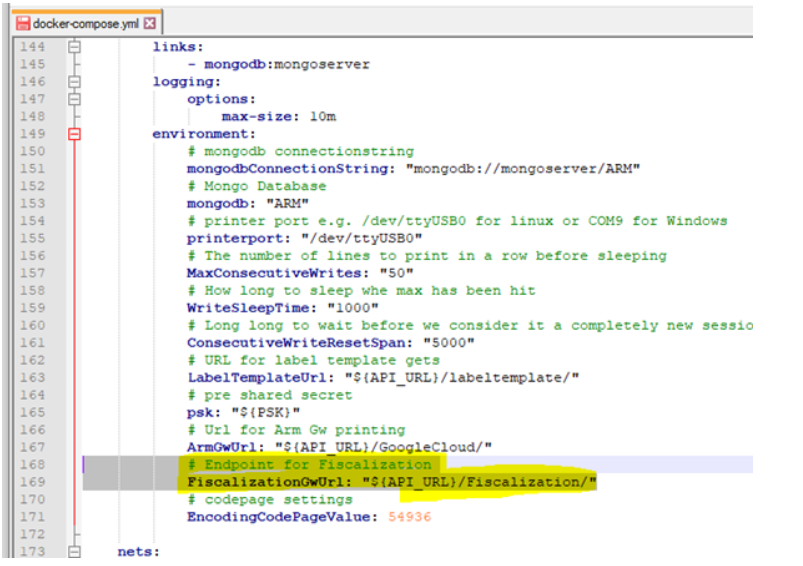
Step 6 – Connector Docker Compose
On the compose file used on the Connector, we need to ensure that the latest DeviceWorker_DeviceGateway image is used and ensure that the following line is added to the environment variables for the Deviceworker_DeviceGateway section
|
Name |
Value |
|
FiscalizationGwUrl |
${API_URL}/Fiscalization/ |