Item Group
- If you have products that are not set up in the system or you don't want to track stock for them, you can still sell them using the "Item Group" button when making a transaction. This feature allows you to sell an item without having to specify which item it is. It comes in handy when you have small-value items that you want to clear stock of and won't be restocking, or if the item doesn't have a barcode.
- The Item Group sales help you track and analyse your sales at a higher level, rather than tracking individual articles. The Item Groups available on the point of sale (PoS) are derived from the Item Hierarchy structure.
- Each Item Group has a tax code associated with it, so you can ensure that you're collecting the right amount of tax. However, for an Item Group to show up on the PoS, the shop must be linked to the same Tax Group Code as the Item Hierarchy, and the shop must be in a Group that has the Item Hierarchy selected.
The following explains the process in detail.
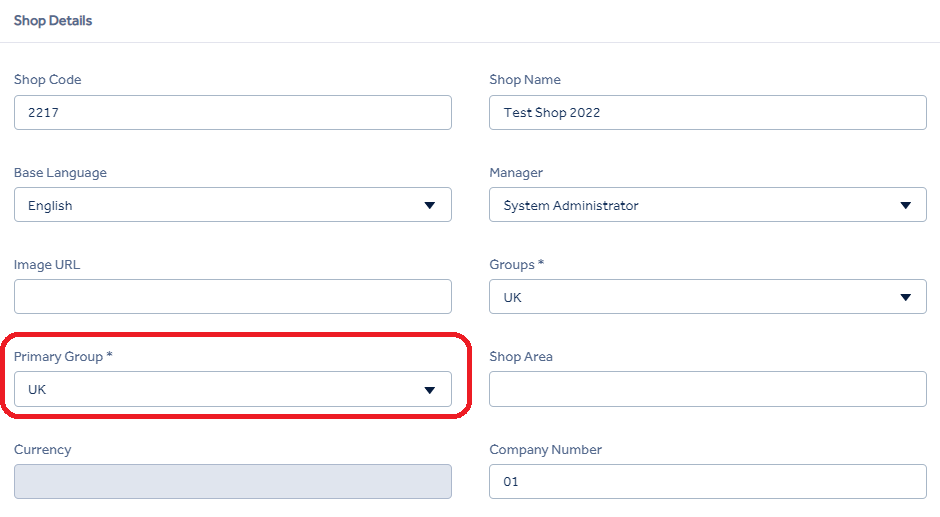
- To select where you want the Item Group to appear on the Point of Sale (POS), you need to go to the Back Office and navigate to "Shops" from the list of options. From there, make sure you select the appropriate location and take note of the Primary Group and Tax Group information. This will ensure that the Item Group is displayed correctly on the POS.

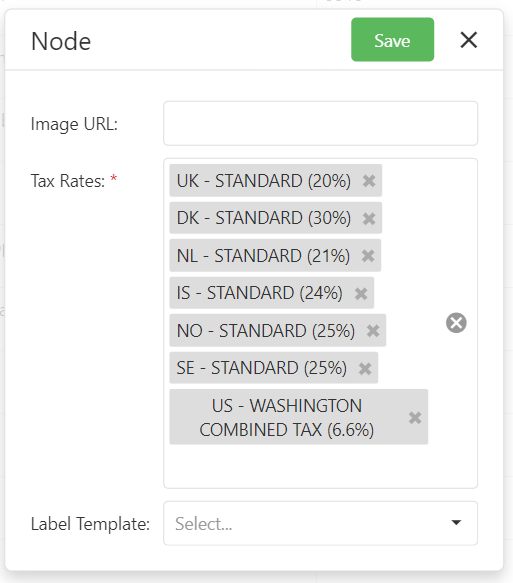
- To view the tax rates for a particular Item Hierarchy, go to "Inventory" in the menu and select "Item Hierarchies". Choose the Node that you want to check the tax rate information for and click on the edit icon. This will bring up a window where you can view the assigned tax rates and make adjustments if necessary. If you need to adjust the tax rates, refer to the "Create Hierarchies Root Node" section for guidance.
In the tax rates list, you can find the Tax Group Name as part of the title.
NOTE: You can only select one tax code per tax group.
- To set up Item Hierarchies for your groups, navigate to "Groups" in the Back Office. You can either create a new group (and set it as the Primary Group for your shop), or edit an existing group that you noted earlier. Make sure you are on the Group Details page for the next step.
- On the Group Details page, ensure that the Item Hierarchy list includes the hierarchy you want to display on the Point of Sale (PoS). If it doesn't, select the relevant hierarchy from the drop-down list. Remember to save any changes you make.
- When you launch your shop's PoS, the "Item Groups" button will display the groups you set up in this step. To access it, simply click the "Item Groups" button from the menu.
The configured Item Groups can be viewed in the centre panel using this feature.
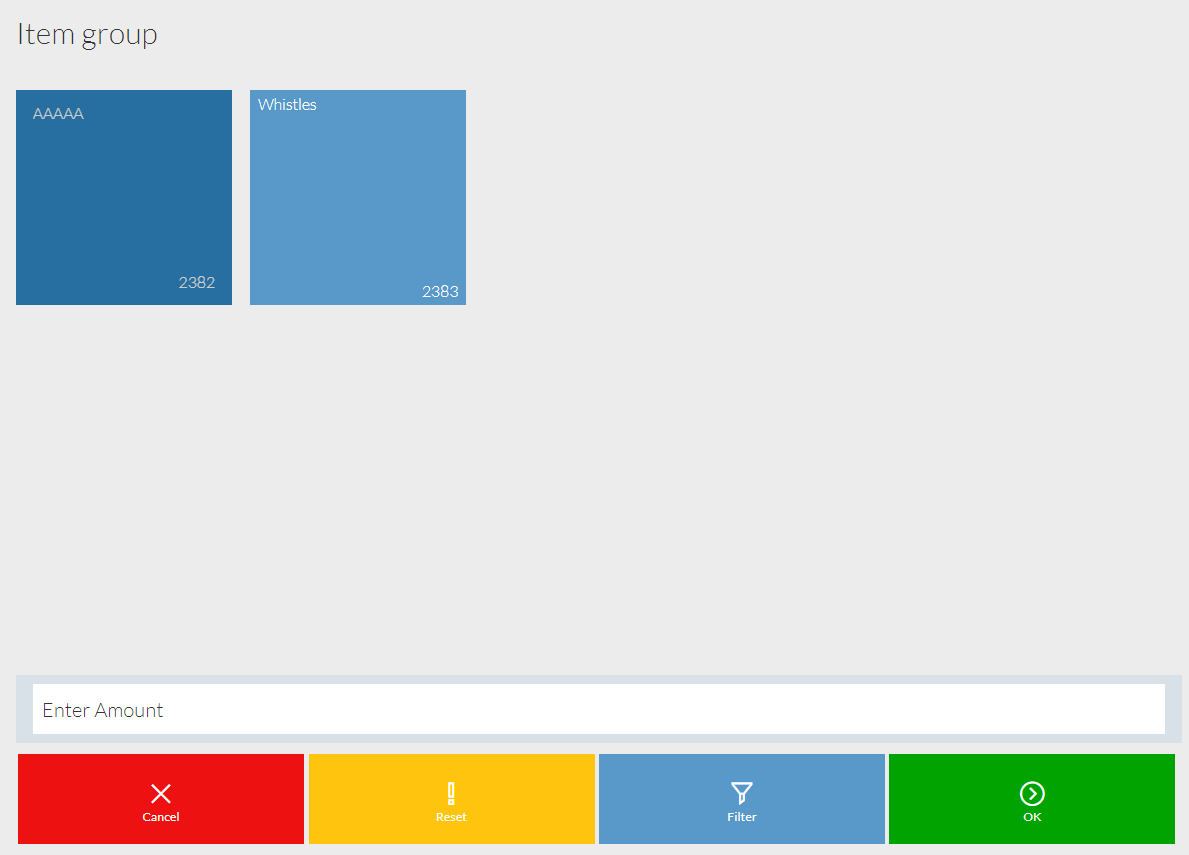
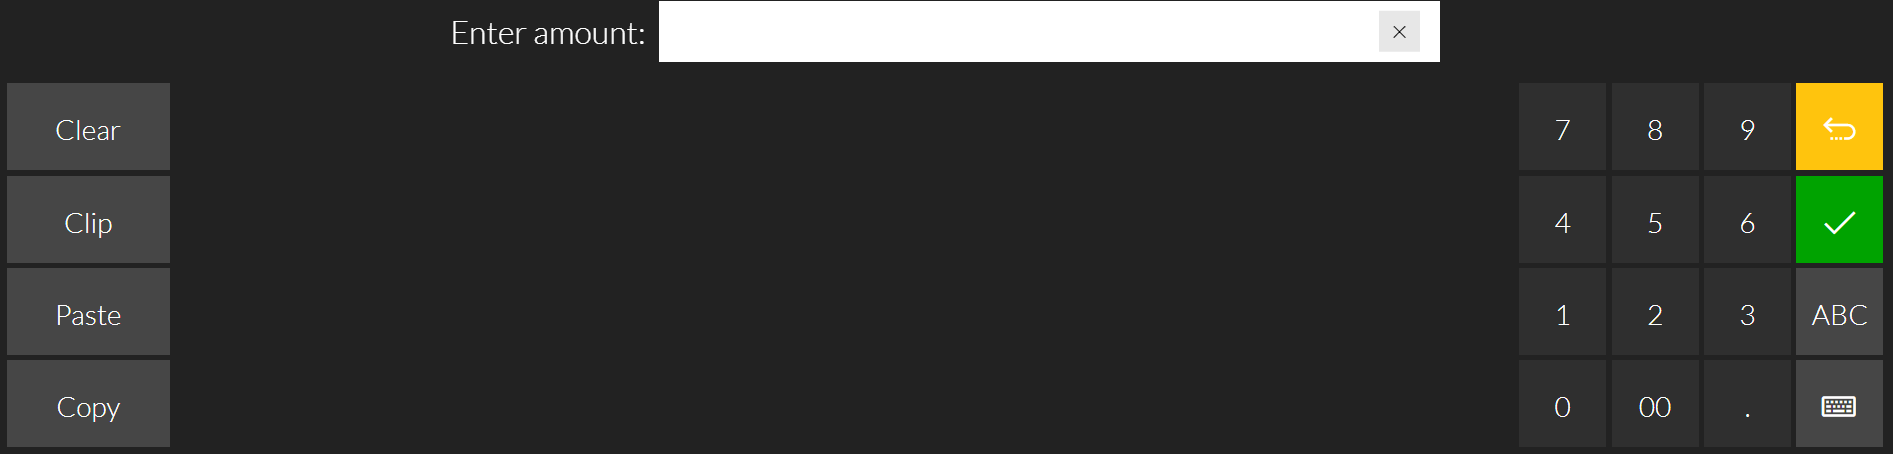
To sell items against a specific Item Group, simply click on it and enter the desired selling price when prompted.
If you have several Item Groups, you can use the filter buttons at the bottom to refine your list. Clicking on the filter button will display the filter, after which you can utilize the search box to further narrow down your list of Item Groups. Additionally, the "Sort By" option enables you to arrange your Item Groups by either ID number or Name.

![]() The Reset button will clear any applied filters.
The Reset button will clear any applied filters.
![]() The cancel button will return you to the Transaction screen.
The cancel button will return you to the Transaction screen.