Price Lists
Some Companies will have multiple price lists depending on the shops/locations these price lists are agreed upon and used when transferring/moving items or stock between locations or businesses.
Adding a Price List
If you have no current price lists set you will see the No Data in the Price list table.
To begin creating a price list click the +Add Price List icon.
|
Name* |
This is used to reference the Price List. |
|
Source |
This is the location the items will be sent from. |
|
Destination* |
This is the location that will receive the items. |
Select which Companies you wish to set up from the drop-down menu and
NOTE: If no Companies are displayed, you will need to create one using the Companies module.
If you have more than one shop assigned to a company you can use the drop-down and select the shop.
NOTE: You cannot select the same shop for Source and Destination.
Once you have selected your options for the price list click +Create Item List.

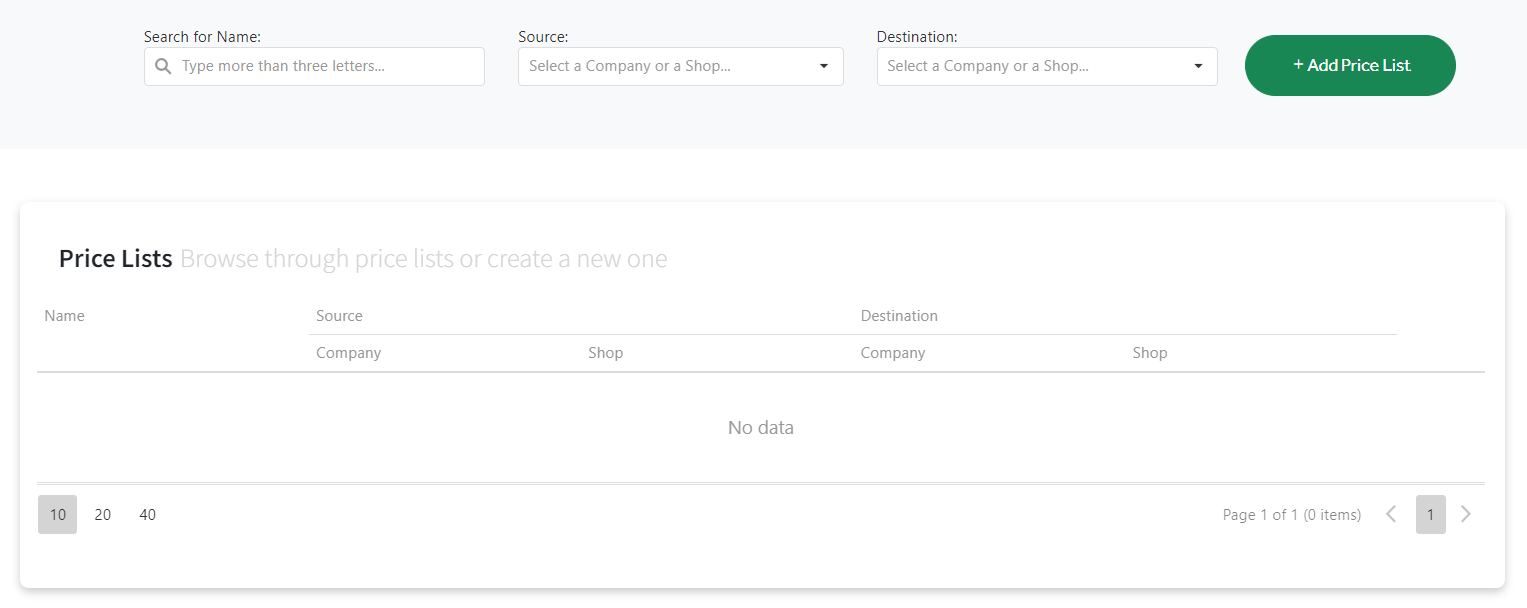
Search for an Existing Price List
![]()
You can use the search function to narrow down and locate specific existing Price Lists when required.
|
Search for Name |
This is the name given to the Price List at creation. |
|
Source |
This is the Source chosen when the Price list was created. |
|
Destination |
This is the Destination chosen when the Price list was created. |
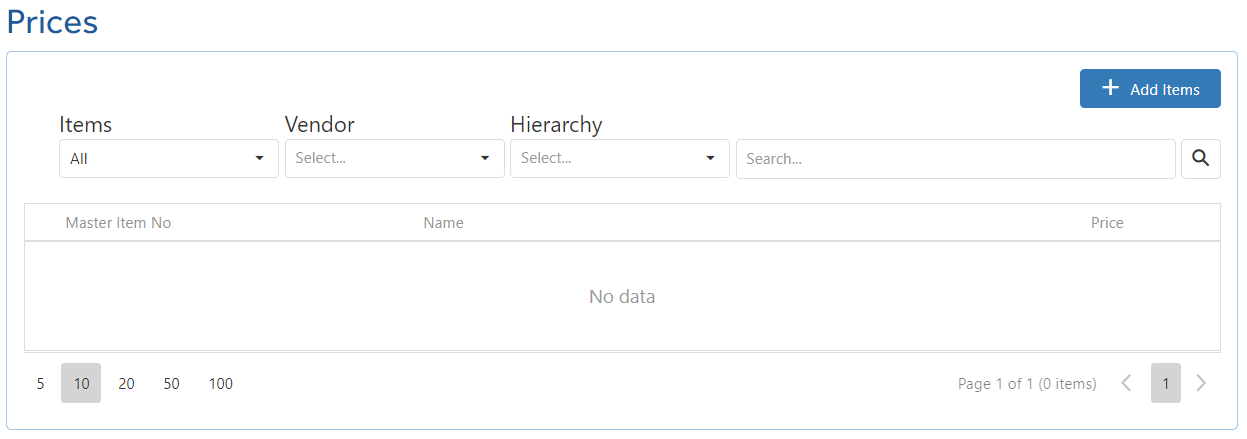
Adding Items to a Price List
Once you have created your price list, a section will appear below where you will be able to add items to the list.
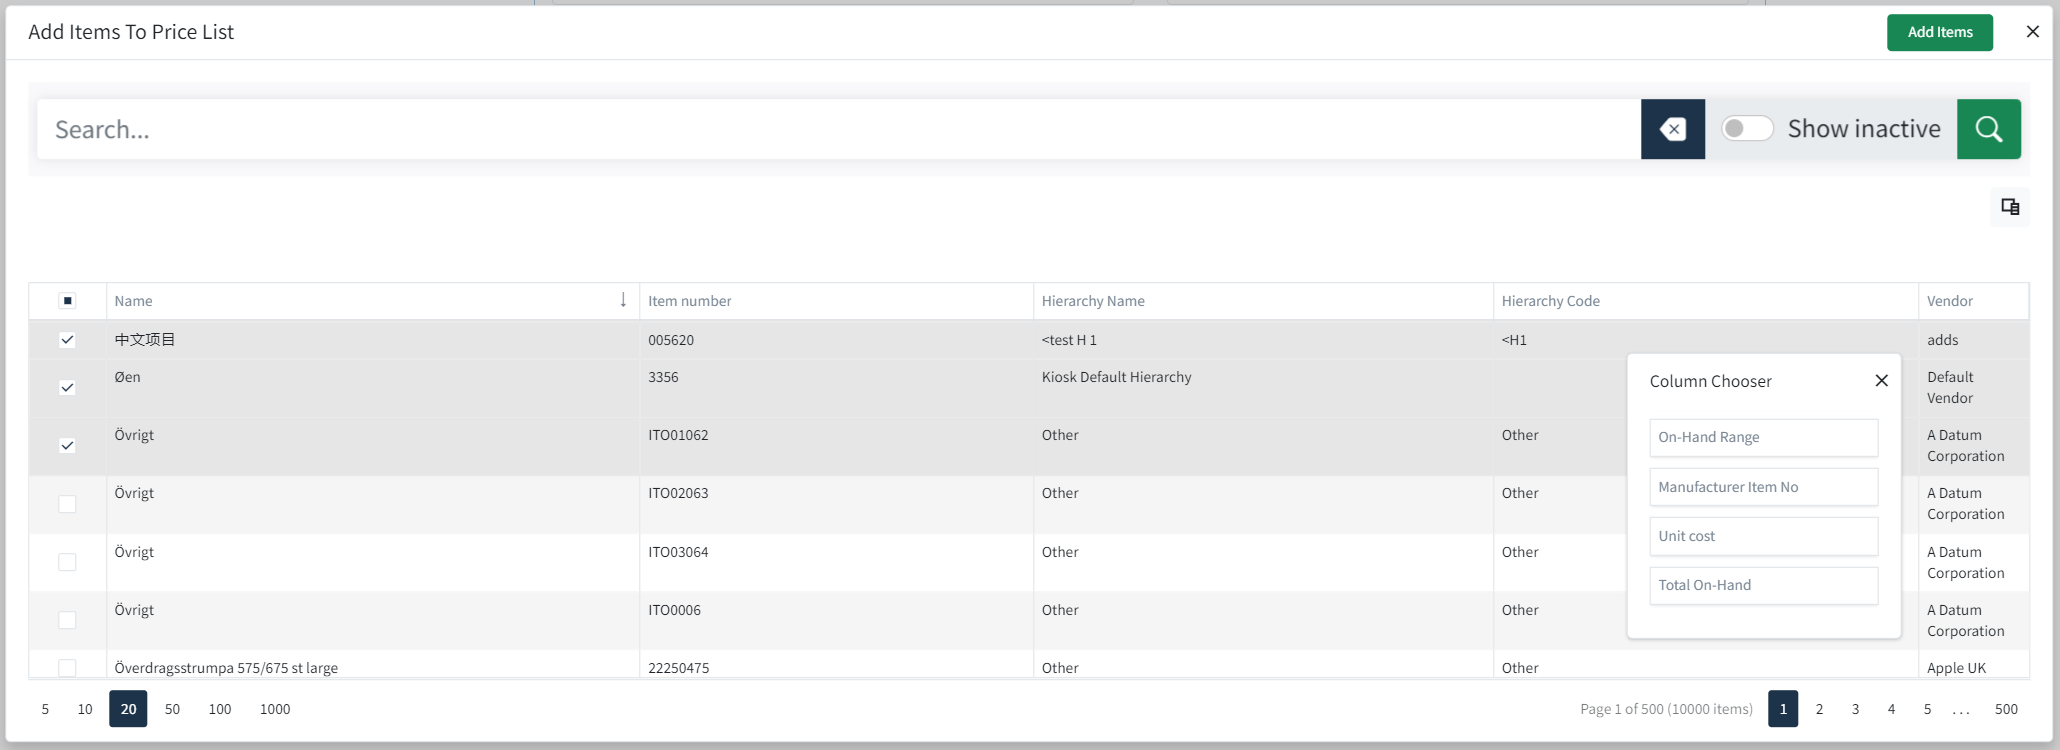
To begin click the +Add Items and the add items window will appear.
Using the left-hand column you can check which items you wish to add to the price list alternatively if you wish to add everything you can tick the box this will select all the items.
Show Inactive Toggle:
![]() This will not display inactive items.
This will not display inactive items.
![]() This will show inactive items.
This will show inactive items.
Once you have the items selected click the Add Items and you will be returned to the Price List page.
NOTE: You can add items to a list at any time.

 Column Chooser
When adding items from the items list you can use to column chooser to narrow down which columns you see.
Click the column chooser icon and from here you can drag and drop columns depending on the information you wish to see.
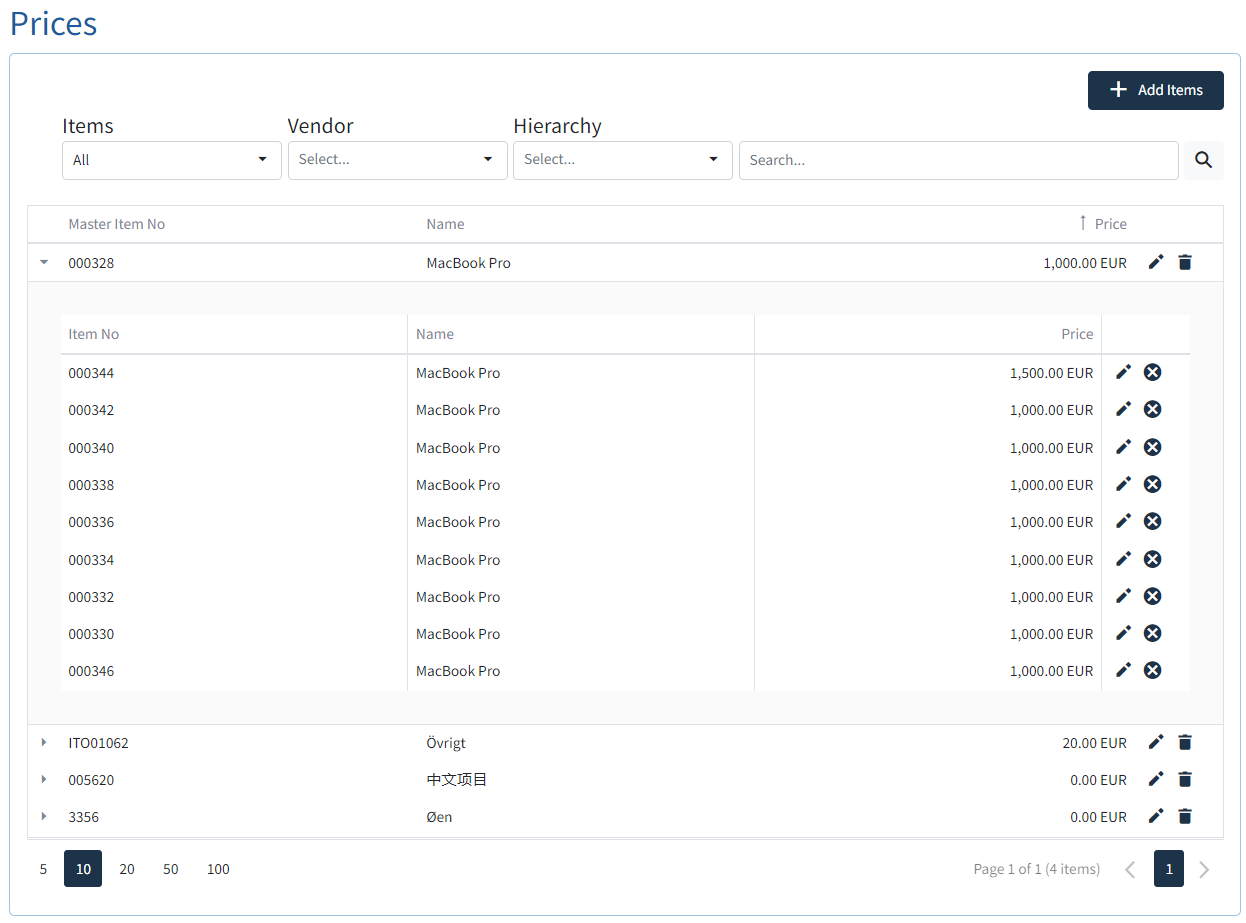
Edit Item Prices
Once the items are added to the Price list you can edit the price of item.
NOTE: If you change an Item Price which has Variable item prices assigned then the variable prices will reset.
![]() Edit: Input the price for the item.
Edit: Input the price for the item.
![]() Save: Saves the input item price.
Save: Saves the input item price.
 Delete: This will remove the item from the list.

Edit Variable Item Prices
A parent item may have variables set these are items that might come in different colours or sizes if these are available they will show below using the  icon.
icon.
You can set individual prices for variables* (if available).
![]() Edit: Input the price for the item.
Edit: Input the price for the item.
![]() Save: Saves the input item price.
Save: Saves the input item price.
 This will remove the item from the price list.
Using the Search Item Fields

You can add specific items using the Item Search fields.
|
Items |
|
|
Vendor |
Select the Vendors available to your tenant. |
|
Hierarchy |
This is the Item level which was set when the item was created. |
|
Search |
This can be used to narrow down the search using a Item Number or Item Name. |